- کالاهای جدید
- فروش ویژه
- آردوینو
- ماشین های مونتاژ PCB
- کتاب ها و پکیج های آموزشی
- کیت ها
- گلخانه هوشمند
- مینی پی سی
- سایر بردها
- قطعات الکترونیک
- ماژول های صوتی
- ارتباطات
- دوربین و تصویر برداری
- ربات های پرنده
- محصولات RFID
- سنسور ها و ماژول ها
- لیزر ها
- LED و لامپ
- USB Host
- اسکنر بارکد
- انکودر
- بخار ساز
- تاریخ و ساعت
- تشخیص اثر انگشت
- تشخیص سطح مایع
- تشخیص مانع و خط
- سایر ماژول ها
- سنجش مسافت
- سنسور پی هاش
- شعله و حرارت
- عصب و عضله
- فشار و ارتفاع
- ماژول دوربین
- مولد سیگنال
- نبض و فشار خون
- نیرو و وزن
- هاب
- هواشناسی
- پتانسیومتر
- پرینتر و چاپگر
- کارتخوان مغناطیسی
- کوره القایی
- کی پد و جوی استیک
- حرکت و لرزش
- شتاب و زاویه
- تشخیص گاز
- جریان و ولتاژ
- دما و رطوبت
- کارتخوان اس دی
- سوئیچ و رله ها
- صوت و آوا
- مکان یابی
- ژیروسکوپ
- لمس و فشار
- مبدل ها
- نور و رنگ
- آب و مایعات
- امواج مغزی
- رادیو اکتیو
- جریان آب
- مغناطیس
- گرد و غبار
- اثر هال
- ابزار آلات و تجهیزات
- آهنربا و مغناطیس
- ابزار اندازه گیری
- ابزار لحیم کاری
- اسکرچرها
- باکس و نگهدارنده
- برد بورد-مدار چاپی
- تبدیل ها
- تجهیزات کامپیوتری
- ترازوی دیجیتال
- دستگاه اسید کاری
- شیر برقی
- فن
- قفل های الکترونیکی
- قلم مو
- لوازم بسته بندی
- لوازم چاپ PCB
- محافظ برق شهری
- مولتی متر
- میکروسکوپ
- هاب
- هیتر ها
- پمپ
- چسب ها
- کابل و سیم
- کارت حافظه و مبدل
- پروگرامر و آنالایزر
- اسیلوسکوپ
- سایر
- ابزار
- منبع تغذیه و باتری
- موتور ها و درایور
- هوشمند سازی و امنیت
- نرم افزار ها
- نمایشگر ها و درایور
- قطعات رباتیک
- پروفیل و اتصالات مربوطه
- پرینتر سه بعدی
- محصولات واحد پرینت 3بعدی
- اسکنر سه بعدی
- ماشین های CNC و برش
- پروژه ها
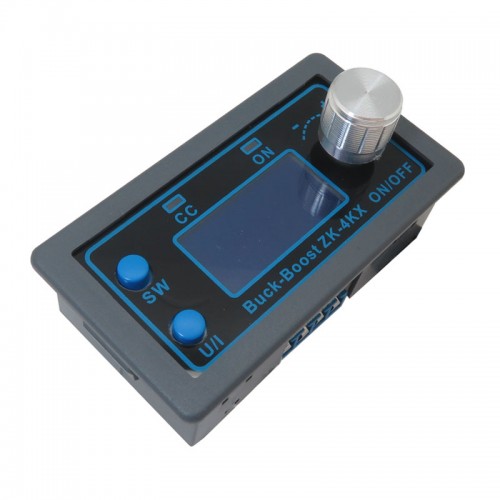
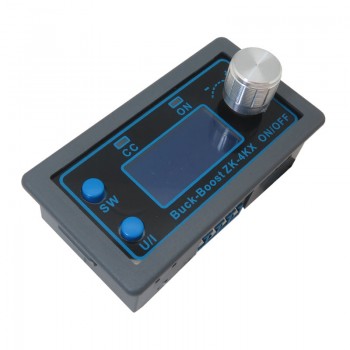
ماژول افزاینده کاهنده ولتاژ ZK-4KX
ماژول افزاینده کاهنده ولتاژ ZK-4KX با ولتاژ قابل تنظیم خروجی 0.5 تا 30 ولت
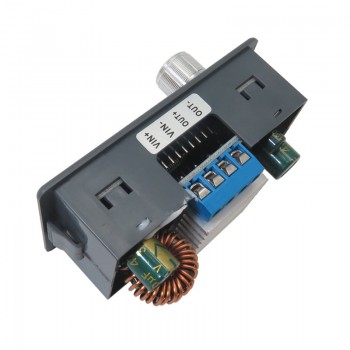
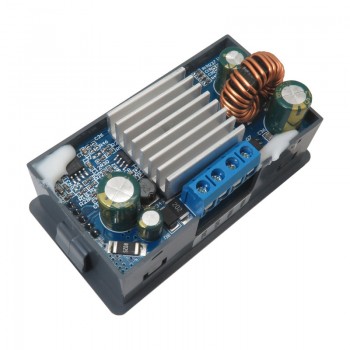
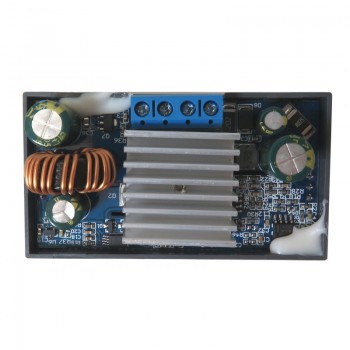
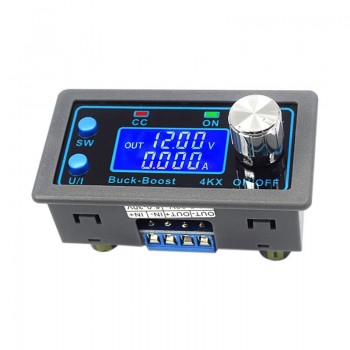
ماژول افزاینده و کاهنده ولتاژ ZK-4KX یک مبدل DC به DC است که میتواند ولتاژ ورودی را در محدوده 5 تا 30 ولت تنظیم کند. ولتاژ خروجی آن به سرعت و دقت بین 0.5 تا 30 ولت قابل تنظیم است و جریان خروجی تا 4 آمپر محدود میشود. این مبدل دارای یک نمایشگر LCD است که ولتاژ ورودی و خروجی، جریان، توان و زمان را نشان میدهد.نحوه استفاده از ماژول:
- با فشار کوتاه روی دکمه SW، میتوانید بین نمایشهای مختلف مانند جریان، توان و زمان جابجا شوید. با فشار طولانی، میتوانید ولتاژ ورودی و خروجی را تغییر دهید.
- با فشار دکمه U/I، به حالت تنظیم ولتاژ میروید. با چرخاندن انکودر، ولتاژ را تنظیم کنید و پس از اتمام، دکمه U/I را دوبار فشار دهید تا به حالت عادی برگردید.
- با فشار دکمه U/I دوباره به حالت تنظیم جریان بروید. با چرخاندن انکودر، مقدار جریان را تنظیم کنید.
- با فشار دکمه U/I، میتوانید تعیین کنید که ماژول هنگام روشن شدن خاموش باشد یا روشن.
- با فشار دکمه U/I، به تنظیمات حفاظتی بروید و پارامترهای مختلف مانند آستانه ولتاژ و جریان را انتخاب و تنظیم کنید.
- با فشار دکمه U/I به حالت کالیبراسیون بروید و با چرخاندن انکودر، ولتاژ و جریان را کالیبره کنید.
کاربرد ماژول باک بوست ZK-4KX:
- شارژ باتری خورشیدی
- کاربرد صنعتی
- منابع تغذیه
مشخصات ماژول باک بوست ZK-4KX:
- ولتاژ ورودی: 5.5 تا 30 ولت
- ولتاژ خروجی: 0.5 تا 30 ولت
- حداکثر جریان خروجی: 4 آمپر
- بازدهی: 88 درصد
- دقت رگولاسیون ولتاژ: 0.01V
- دقت رکولاسیون جریان: 0.001A
- حداکثر جریان خروجی: 4 آمپر
- شروع با راه اندازی نرم
- فرکانس کار: 180KHZ
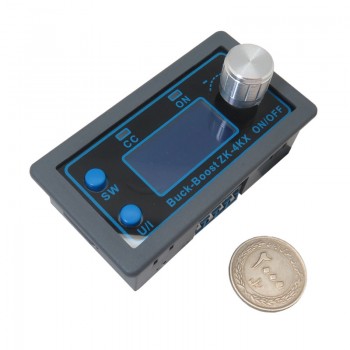
- ابعاد: 79mm*43mm*26mm
- وزن: 92 گرم
- محافظت در برابر ولتاژ بالا
- محافظت در برابر جریان بالا
- محافظت در برابر ورودی معکوس
- محافظت در برابر دمای بالا
مستندات:
ماژول منبع تغذیه ZK-4KX
2. Set the output voltage value - short press the U/I button in the normal interface to enter the setting voltage and constant current interface. It can be seen that a certain digit of the set output voltage value is flashing, turn the rotary encoder left and right, and it can be adjusted to increase or decrease. Short press the rotary encoder to choose which bit of the output voltage to set. After the setting is completed, short press the U/I button twice to return to the normal interface. Or after stopping the operation for 10s, it will automatically return to the normal interface.
3. Set the constant current value (that is, the maximum current value that the module allows to output) - short press the U/I button in the normal interface to enter the setting voltage and constant current interface. Short press the U/I button again to switch to setting the constant current value. You can see that a certain digit of the constant current value is flashing. Turn the rotary encoder left and right to adjust the value. Short press the rotary encoder to choose which bit of the constant current value to set. After the setting is completed, short press the U/I button to exit the setting voltage and constant current interface and return to the normal interface. Or after stopping the operation for 10s, it will automatically return to the normal interface.
4. Set the module to be on/off by default on power -on - long press the U/I button in the normal interface to enter the parameter setting interface. It can be seen that OPEN OFF or OPEN ON. OPEN OFF means the output is turned off by default when power on, and OPEN ON means the output is turned on by default when it is powered on. Long press the rotary encoder to switch between two states. After the setting is completed, long press the U/I button to return to the normal interface.
5. Set the protection parameter open state and threshold - long press the U/I button in the normal interface to enter the parameter setting interface. Short press the SW button until the protection parameter you want to set appears. LUP——undervoltage protection threshold; OUP——overvoltage protection threshold; OCP——overcurrent protection threshold; OPP——overpower protection threshold; OAP——overcapacity protection threshold; OHP timeout protection threshold; OTP——overtemperature Protection threshold. Short press the rotary encoder to select which digit of the protection parameter you want to set. Long press the rotary encoder to set the protection parameter on or off (only the timeout protection and overcapacity protection can be set to be on/off, other protection parameters are enabled by default.). Rotating the encoder left and right can make the parameter bigger and smaller. After the setting is completed, long press the U/I button to return to the normal interface.
6. Calibrate voltage and current - long press the U/I button in the normal interface to enter the parameter setting interface. Short press the SW button until the parameter interface with CAL appears. The one with CAL+IN+V symbol is the calibration input voltage interface; the one with CAL+OUT+V symbol is the calibration output voltage interface; the one with CAL+OUT+A symbol is the calibration output current interface. Rotate the encoder left and right to adjust the parameter size. After the adjustment is completed, long press the rotary encoder to confirm that the adjustment is completed, and the parameter value is not flashing at this time. Long press the U/I button to return to the normal interface.


